Using Terraform to Up Your Automation Game - Building the Fleet

Populating our Virtual Private Cloud

In the previous post we successfully created our Virtual Private Cloud (VPC) in AWS via infrastructure as code utilizing Terraform, which provided us the ability to stand up and tear down our infrastructure landing pad on demand.  Now that our landing pad is complete and can be deployed at any time, let's build our fleet of load balanced web servers.

Building the Fleet Using Terraform Modules

Taking a similar approach to our VPC build out we will once again utilize Terraform modules, this time to create and build out our web server fleet.  In addition to the Terraform Module Registry there are a number of different sources from which to select ready built modules - including GitHub.  For our web server cluster we will utilize a short and simple webserver_cluster module that I have made available in my GitHub terraform repository.

This module creates a basic web server cluster which leverages an AWS launch configuration and auto scaling group to spin up the EC2 instances that will be perfuming as web servers.  It also places a load balancer in front of these servers which balances traffic amongst them and performs health checks to be sure the fleet is bullet proof.  The module also configures the necessary security groups to allow http traffic inbound.  All we need to do is to specify the size and number of the web servers and where to land them.

To call this module we simply need to append to the main.tf file to call the webserver_cluster module and specify how our web server fleet should be built.

module "webserver_cluster" {
source = "github.com/gmaentz/terraform/modules/services/webserver-cluster"
cluster_name = "webserver-dev"
ami = "ami-a9d09ed1"
key_name = "MyOregonSSH"
instance_type = "t2.micro"
min_size = 2
max_size = 2
vpc_id = "${module.vpc.vpc_id}"
subnet_ids = ["${module.vpc.public_subnets}"]
}

In the code statement above we simply call out the source of our webserver_cluster module which resides in GitHub, specify a name for our cluster, the image and size server to use, a key name should we need to connect to an instance, the minimum and maximum number of servers to deploy, along with the VPC and subnets to place them in (referenced from our VPC build out).

In this case we are going to deploy two web servers to the public subnets we built in our VPC.

Deploying the Fleet

After updating our main.tf file with the code segment above, let's now initialize and test the deployment of our web servers.  Since we are adding a new module plan we must rerun our terraform init command to load the module.  We can then execute a terraform plan for validation and finally terraform apply to deploy our fleet of web servers to the public subnets of or VPC residing in AWS us-west-2.

webserver_cluster_module.png

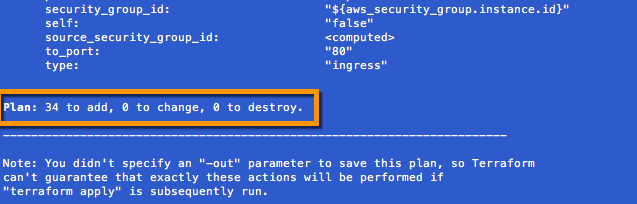
Validate the Plan and Deploy using terraform plan and terraform apply.

terraform_plan_webservers.png
terraform_apply.png
terraform_plan2.png
terraform_apply2.png

Accessing the Fleet

So our deployment is complete, but how can we access it?  When building infrastructure, Terraform stores hundreds of attribute values for all of our resources.  We are often only interested in just a few of these resource, like the DNS name of our load balancer to access the website.  Outputs are used to identify and tell Terraform what data is important to show back to the user.

Outputs are stored as variables and it is considered best practice to organize them in a separate file within our repository.  We will create a new file called outputs.tf in the  same directory as our main.tf file and specify the key pieces of information about our fleet, including:  DNS name of the load balancer, private subnets, public subnets, NAT IPs, etc.

# VPC
output "vpc_id" {
description = "The ID of the VPC"
value = "${module.vpc.vpc_id}"
}
# Subnets
output "private_subnets" {
description = "List of IDs of private subnets"
value = ["${module.vpc.private_subnets}"]
}
output "public_subnets" {
description = "List of IDs of public subnets"
value = ["${module.vpc.public_subnets}"]
}
# NAT gateways
output "nat_public_ips" {
description = "List of public Elastic IPs created for AWS NAT Gateway"
value = ["${module.vpc.nat_public_ips}"]
}
output "elb_dns_name" {
value = "${module.webserver_cluster.elb_dns_name}"
}
output "asg_name" {
value = "${module.webserver_cluster.asg_name}"
}
output "elb_security_group_id" {
value = "${module.webserver_cluster.elb_security_group_id}"
}
view raw outputs.tf hosted with ❤ by GitHub

After creating and saving the outputs.tf file, we can issue a terraform refresh against our deployed environment to refresh its state and see the outputs.  We could have also issued a terraform output to see these values, and they will be displayed the next time terraform apply is executed.

outputs.png

Browsing to the value contained in our elb_dns_name output, we see our website.  Success.

web_output.png

Scaling the Fleet

So now that our fleet is deployed, let's scale it.  This is a very simple operation requiring just a small adjustment to the min and max size setting within the webserver_cluster module.  We will adjust two lines in main.tf and rerun our plan/deployment.

....  min_size            = 8 max_size            = 10  .... 
scalethefleet.png

Viola.  Our web server fleet now has been scaled up with an in place update that has no service disruption.  This showcases the power of infrastructure as code and AWS auto-scaling groups.

awsscalethefleet1.png
awsscalethefleet.png

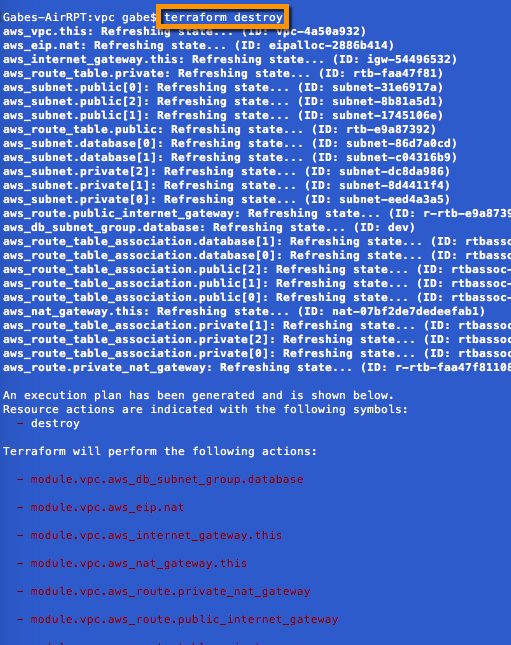
Scaling back our fleet, as well as clean up is equally as easy.  Simply issue a terraform destroy to minimize AWS spend and wipe our slate clean.

Multi-Region/Multi-Enviornment Deployment

Now that we have an easy way to deploy and scale our fleet, the next step is to put our re-usable code to work to build out our development, staging and production environments across AWS regions.

Terraform Series

This is part of a Terraform series in which we cover:

Using Terraform to Up Your Automation Game

As a proponent of automation I am a big fan of using Terraform to deploy infrastructure across my environments.  Terraform is a tool for building, changing, and versioning infrastructure safely and efficiently.  With an ever-growing list of supported providers it is clear that it belongs in our automation toolbox and can be leveraged across local datacenter, IaaS, PaaS and SaaS deployments.  If you come from a VMware background and work with AWS or Azure, like me, I would recommend checking out Nick Colyer's PluralSight course and Yevgeniy Brikman's "Terraform: Up & Running" book / blog posts.  Hopefully this post will entice you to learn more.

Mission

Our mission is to create and deploy a set of auto-scaling web servers, front ended by a load balancer for our development, staging and production environments across 3 different AWS regions.  We will utilize a modular approach to create and build our infrastructure, and reuse our code when possible to keep things simple.

Building A Virtual Private Cloud

Before deploying any instances, we need to create our landing pad which will consist of a dedicated VPC (Virtual Private Cloud) and the necessary subnets, gateways, route tables and other AWS goodies.  The diagram below depicts the development environment to be deployed in the AWS us-west-2 region, including private, public and database subnets across 3 availability zones.

awsvcpdev.png

Terraform allows us to take a modular approach for our deployment by offering self-contained/packaged configurations called modules.  Modules allow us to piece together our infrastructure, and enable the use of reusable components.  Terraform provides a Module Registery of community and verified modules for some of the most common infrastructure configurations.  For our purposes we will leverage the VPC module for AWS.

To begin creating our development VPC, we can create a file called main.tf.  Inside this Terraform file we will add a few lines of declarative code and the AWS provider to attach to the us-west-2 region.  I am hiding my AWS credentials, but you can include them under the AWS provider.

provider "aws" {
region = "us-west-2"
}
module "vpc" {
source = "terraform-aws-modules/vpc/aws"
name = "dev"
cidr = "10.0.0.0/16"
azs = ["us-west-2a", "us-west-2b", "us-west-2c"]
private_subnets = ["10.0.1.0/24", "10.0.2.0/24", "10.0.3.0/24"]
public_subnets = ["10.0.101.0/24", "10.0.102.0/24", "10.0.103.0/24"]
database_subnets = ["10.0.201.0/24", "10.0.202.0/24"]
enable_nat_gateway = true
single_nat_gateway = true
tags = {
Owner = "user"
Environment = "dev"
}
vpc_tags = {
Name = "dev-environment"
}
}
view raw main.tf hosted with ❤ by GitHub

We add a few additional lines of code to our main.tf file inserting the VPC module for AWS to define the availability zones, subnets, IP addresses and tags.  You can carve out your subnets as you see fit.  Less then 30 lines of code and we are now ready to initialize and deploy a working VPC for our development envioronment.  You can see why I like Terraform.

Deploying our VPC

To deploy our newly created VPC, we simple need to install Terraform on our computer, initialize and plan the deployment and then apply it.  The download and install of Terraform is very straight forward as it deploys as a single binary.  From the command line browse to the directory that holds your main.tf file, and execute the initialize, plan and apply commands.

terraform init

The first command that should be run after setting up a new Terraform configuration is terraform init.  This command is used to initialize a working directory containing Terraform configuration files, and needs to be run from the same directory that our main.tf file is located.

terraforminit.png
terraform plan

Before deploying our development environment, Terraform provides the ability to run a check to see whether the execution plan matches our expectations for what is to be deployed.  By running the terraform plan command, no changes will be made to the resources or state of our environment.  In our case, there will be 25 additions to our development environment and these created items are detailed in the output of the terraform plan command.

terraformplan1.png
 
terraformplan2.png
terraform apply

Now that everything is initialized and the plan meets our expectation, it is time to deploy.  The terraform apply command is used to apply the changes specified in the execution plan.  You will be prompted to enter 'yes' in order to deploy.  The summary of this command shows that all 25 additions completed.  We now have a working VPC for our development environment.

terraformapply1.png
 
terraformapplycomplete.png

We can confirm that is the case by logging into AWS and viewing our VPC in the us-west-2 region.

awsvpc.png
terraform destroy

One of my favorite uses of Terraform is to quickly turn up an infrastructure environment with only a few lines of code, and conversely tear it down when it is no longer needed.  This is extremely practical when working with cloud providers to keep costs low and maintain a clean environment which is ready for future deployments.  The terraform destroy command does exactly what you would expect - it is used to destroy the managed infrastructure deployed.  In our case we will utilize terraform destroy to tear down our development VPC.  When we are ready to use it again, we simply issue a plan and apply - which is the power of Infrastructure as Code.

terraformdestroy.png
 
terraformdestroycomplete.png

Deploying our Web Servers, Load Balancers and Auto-Scaling Groups

Now that we have a place to put our web servers, it is time to create and deploy them.  We will complete this process in the next post.

Terraform Series

This is part of a Terraform series in which we cover: